
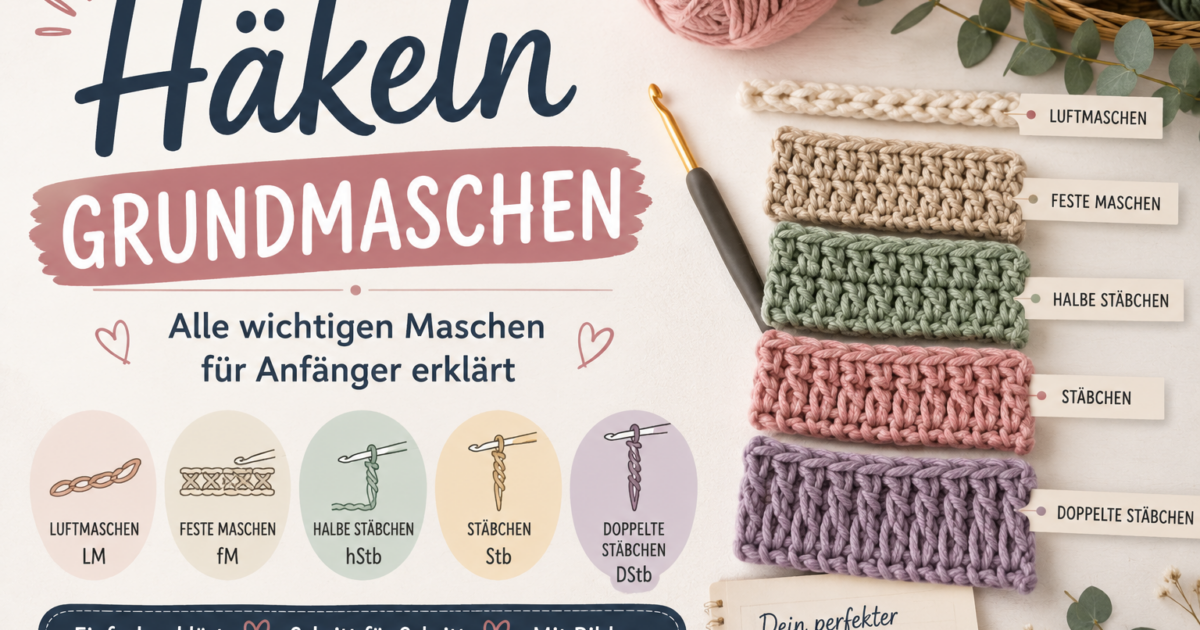
Before you start your first projects, you need to know the basic stitches! Here I explain all the important basic crochet stitches step by step – simply and clearly for absolute beginners.
What you need
🧶 For the first exercises:
- Thick practice yarn (bulky acrylic, 100g)
- Crochet hook: 6mm (larger = easier to see)
- Scissors
1. The loop stitch (starting loop)
Every crochet project begins with a slip knot (also called a „slip knot“ or „loop stitch“):
- Measure the thread approximately 15cm from the end.
- Place the thread end under the long thread (X-shape)
- Insert crochet hook through the X-loop.
- Thread a long thread through and tighten.
- The loop should sit on the needle – not too tightly!
2. Chain stitches (ch) – the foundation
Chain stitches form the starting chain – essentially the „foundation“ of your project:
- Wrap the thread around the needle (wrap it around)
- Pull through the loop on the needle
- One chain stitch is complete!
- Repeat for the desired number of times
Common mistake: Don’t pull too tight – the chain stitches should be loose enough so that you can later insert the needle.
3. Slip stitch (sl st) – for joining
Slip stitches are used to join rows or to move a few stitches forward:
- Insert needle through the indicated stitch
- loop the thread
- Pull through BOTH loops on the needle in one go.
4. Single crochet (sc) – the most important stitch!
Single crochet stitches are the most common stitch in crochet. Almost all amigurumi and many other projects consist solely of single crochet stitches.
- Insert needle through the stitch of the previous row
- Loop the thread around the needle and pull it through (2 loops on the needle)
- Loop the thread around the loop and pull it through BOTH loops.
- One tight stitch is finished!
Note: When making single crochet stitches, you ALWAYS insert your needle under both loops (unless the instructions say otherwise).
5. Half double crochet (h. st.) – between sc and dc
- Wrap the thread around the thread beforehand (wrap)
- Insert needle into stitch
- Thread through (3 loops on needle)
- Loop the thread around the end and pull it through ALL 3 loops.
6. Sticks (St.) – for airy structures
Stitches are twice as high as single crochet stitches and create an airy, open fabric:
- Wrap the thread around the thread beforehand.
- Insert needle into stitch
- Thread through (3 loops on needle)
- Loop the thread around the body, pull through two loops (two loops remain).
- Loop the thread around the loop and pull it through the last two loops.
7. Double crochet (dSt.) – for very airy patterns
Like sticks, but even taller – ideal for lace patterns and airy scarves.
Increases and decreases
increase (raise)
Crochet 2 single crochet stitches into the SAME stitch → the row becomes wider
decrease (reduce)
Crochet 2 stitches together → for single crochet stitches: insert hook into each of 2 stitches, pull yarn through, then pull through both together.
FAQ
Conclusion
With these 6 basic stitches, you’re ready to start your first crochet project! Practice each stitch in a small swatch before beginning your real project. Have fun! 🧶

Noch keine Kommentare – sei die Erste!
✍️ Kommentar hinterlassen
Deine E-Mail-Adresse wird nicht veröffentlicht. Pflichtfelder sind mit * markiert.